Create L2TP to SonicWall609
Pages:
1

|
LiquidLayer private msg quote post Address this user | |
| See source post on Solved.it This article will easily explain how to configure your Apple iPad, iPhone or iPod Touch to access your network by using the SonicWALL WAN GroupVPN Security Association and the built-in L2TP server. This relates to SonicOS Enhanced version 5.2.x (or newer) firmware. Access is granted to the LAN behind via the SonicWALL appliance. You do not need a third party L2TP server solution. How to configure your SonicWALL L2TP VPN server Follow these easy steps in order: 1 - Login to your SonicWALL NSA UTM appliance as the Administrator in Configuration Mode. 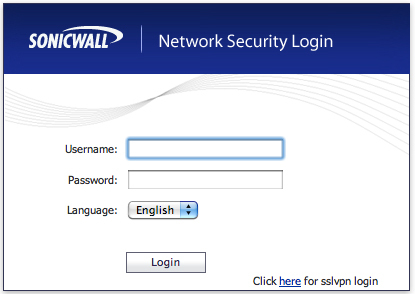 2 - Navigate to Network and Address Objects 3 - Add the following Address Object: Name: iPad L2TP Subnet (or another name you wish to identify with) Zone Assignment: VPN Type: Network Network: 10.99.79.0 - This is the new network subnet that we will assign purely for L2TP connections. It should NOT be a subnet range in use on your network. You do not need to use this address, we have selected for display purposes. Netmask: 255.255.255.0 - We have chosen to use a Class C subnet. 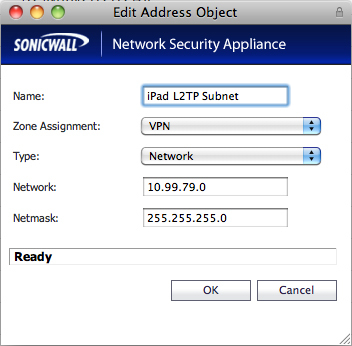 - Click OK to add the Address Object 5 - From the SonicWALL NSA menu select Users and Settings 6 - Ensure that Local Users are available. If you already have LDAP or RADIUS ensure that + Local Users is selected. This ensures you can use your Local User database on the SonicWALL (covered later). 7 - From the SonicWALL NSA menu navigate to VPN and L2TP Server. 8 - Enable the L2TP server and click on Configure. Set the details as follows: Keep alive time (secs): 60 DNS Server 1: 192.168.168.1 (well, obviously use your internal DNS server) DNS Server 2: 192.168.168.2 (again this is for display purposes - if you have a second DNS server, use it) WINS Server 1: 0.0.0.0 (or enter your WINS IP address here) WINS Server 2: 0.0.0.0 (as above) Select Use the Local L2TP IP Pool Start IP: 10.99.79.1 (this is the start IP of the L2TP network you created earlier) End IP: 10.99.79.10 (this is the end IP of the L2TP network you created earlier) User group for L2TP users: Trusted Users (or Everyone if you prefer) 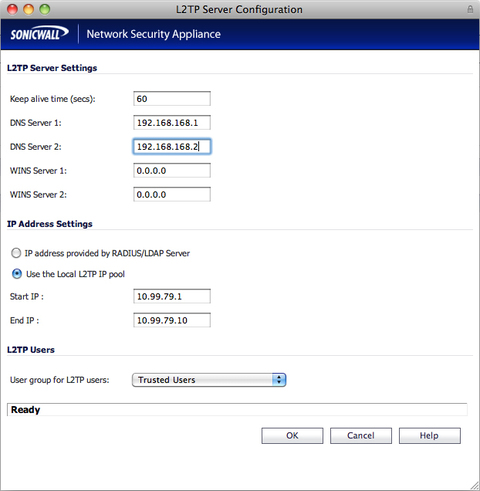 9 - From the SonicWALL NSA menu, whilst still in VPN select Settings 10 - Configure the WAN GroupVPN policy with the following settings: General Tab Shared Secret: password (well, enter your password here) 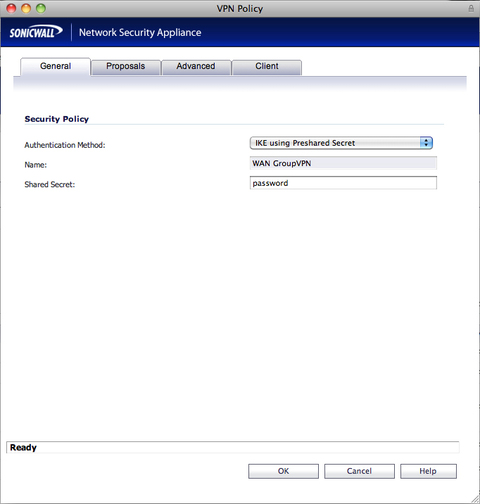 Proposals Tab IKE (Phase 1) Proposal DH Group: Group 2 Encryption: 3DES Authentication: SHA1 Life Time (seconds): 28800 Ipsec (Phase 2) Proposal Protocol: ESP Encryption: 3DES Authentication: SHA1 Enable Perfect Forward Secrecy: Disabled Life Time (seconds): 28800 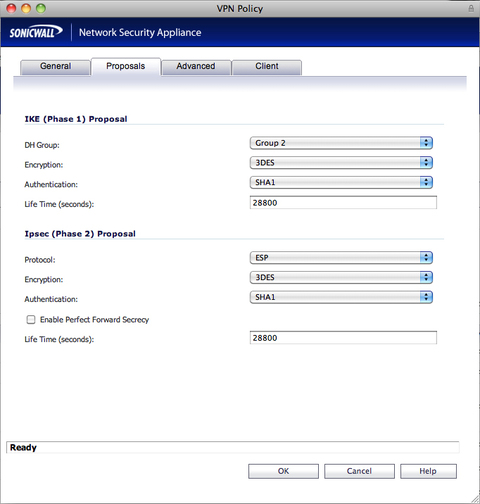 Advanced Tab Enable Windows Network (NetBIOS) Broadcast: Enabled Enable Multicast: Disabled Management via this SA: Unchecked for both HTTP and HTTPS Default LAN Gateway: Public (WAN) IP address of the SonicWALL appliance Require Authentication of VPN Clients via XAUTH: Enabled User Group for XAUTH Users: Trusted Users (or Everyone) Allow Unauthenticated VPN Client Access: Disabled 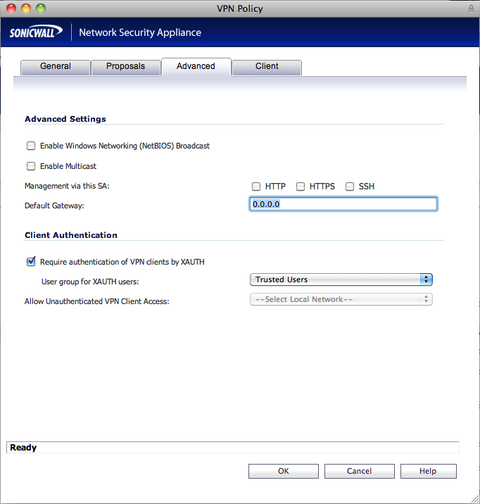 Client Tab Cache XAUTH User Name and Password on Client: Always Virtual Adapter settings: DHCP Lease Allow Connections to: This Gateway Only Set Default Route as this Gateway: Enabled Apply VPN Access Control List: Disabled Use Default Key for Simple Client Provisioning: Disabled 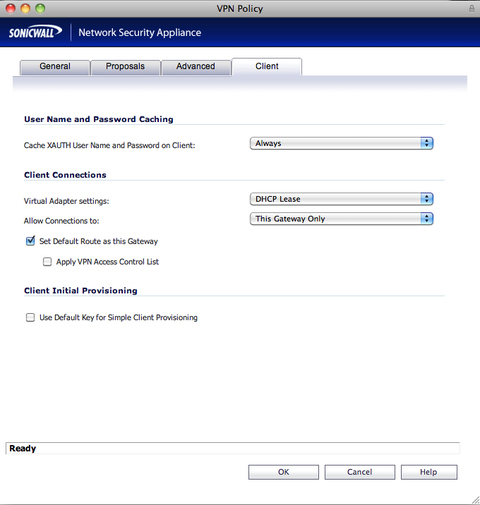 11 - Returning to the SonicWALL appliance menu, and still in VPN, select DHCP over VPN 12 - Select Central Gateway and click on Configure and ensure the following: Use Internal DHCP Server: Enabled For Global VPN Client: Enabled For Remote Firewall: Disabled Send DHCP requests to the server address listed below: Disabled Relay IP Address (Optional): 0.0.0.0 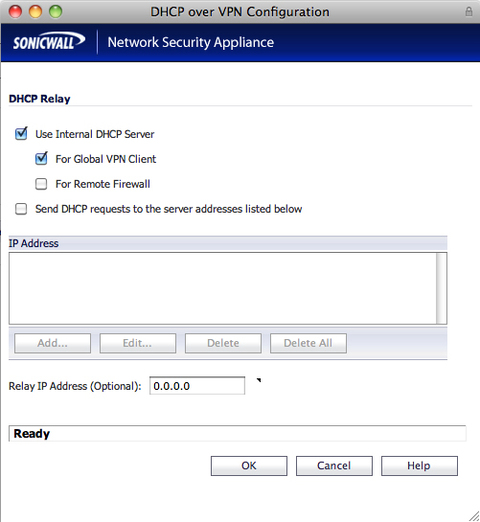 13 - From the SonicWALL menu navigate to Firewall and Access rules 14 - Select VPN to WAN from the matrix or drop down menu and add the following rule: Action: Allow From Zone: VPN To Zone: WAN Service: ANY Source: WAN RemoteAccess Networks Destination: ANY Users Allowed: All Schedule: Always on 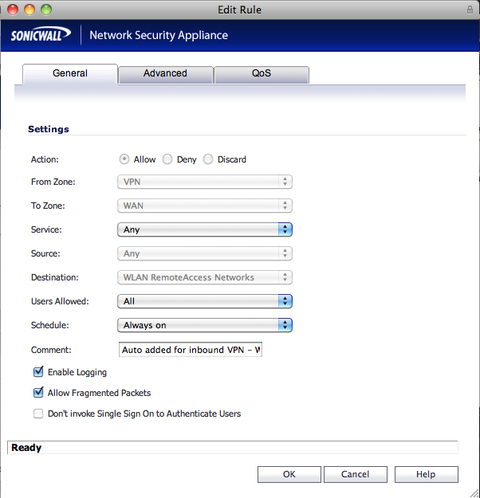 15 - From the SonicWALL menu navigate to Network and NAT Policies 16 - Add the following NAT Policy: Original Source: iPad L2TP Subnet (or whatever you created in Step 3) Translated Source: WAN Primary IP (usually X1 IP) Original Destination: Any Translated Destination: Original Original Service: Any Translated Service: Original Inbound Interface: Any Outbound Interface: X1 (your WAN interface) 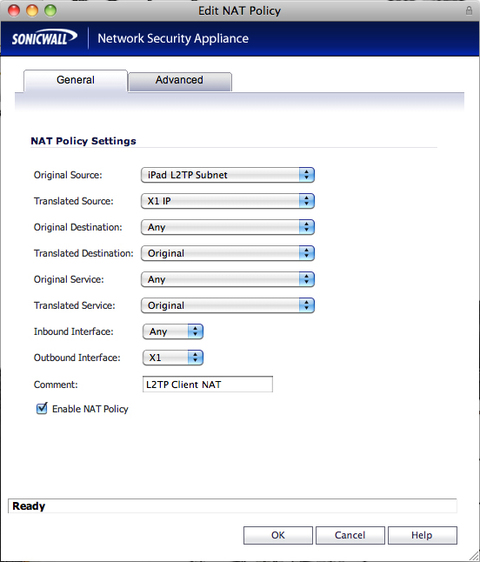 17 - From the SonicWALL NSA menu navigate to Users and Local Users 18 - Create a new user (if one doesn't exist) and then select the VPN Access tab and add the following objects: LAN Subnets WAN RemoteAccess Networks iPad L2TP Subnet (or whatever you called the Address Object that you created in step 3) NOTE: You can add these networks to the Trusted Users or Everyone list if you wish - or individually for users. You must also add any other Address Objects to which you may require access here. We have used the basic LAN Subnets for access to the LAN above for demonstrative purposes. 19 - Click on OK to add the user Thats your SonicWALL Appliance ready! - Now go to Part 2: Setup your iPad / iPhone / iPod Touch See source post on Solved.it Liquid Layer Networks | Performance Cloud Web Hosting http://www.LiquidLayer.net |
||
| Post 1 • IP flag post | ||
Pages:
1
